Sunday, 26 February 2017

Twine storage tower using Inside the lines DSP


Hi everyone

I hope you're all having a lovely Sunday.

I've just finished the above project and I couldn't wait to share it with you all. I've used the Inside the lines DSP from the sale a bration brochure. 
I love how it turned out hope you do too.

Here are the supplies and measurements:

Drawer sleeves x 4...flirty flamingo card measuring 8 1/4" × 2 3/4" score on long side at 1/2", 2", 4 3/8" & 5 7/8"

Drawers x 4....basic black card measuring 5 1/2" × 5 1/8" score on all sides at 1 3/8"
DSP FOR drawer front and insides x 8...needs to measure 2 1/8" × 1 1/8"

Side panels x 2...basic black card measuring 6 1/8" × 2 3/4"
DSP panels need to measure 5 7/8" × 2 1/2"

Back panel...basic black card measuring 6 1/8" × 2 7/8" score on long side at 1/4" & 5 7/8"
DSP panel needs to measure 5 7/8" × 2 1/8"

Panels for both top and base x 6 (3 for each section ) flirty flamingo card measuring 3 1/8" × 2 3/4"

Mat for the top needs to measure 2 1/2" × 2 7/8"

Flirty flamingo marker 
Tombow glue
Tear and tape

For full instructions please see my YouTube video.


Hope you like this project.
Thanks for watching

Love Steffi xxx

Monday, 20 February 2017

House style storage caddy video tutorial

Hi everyone

I've had a lot of people ask if there was a video tutorial for the house style storage caddy.

I decided to bite the bullet and do my very 1st tutorial. I was so nervous lol.

I'm afraid it's quite long and also in 2 parts but part from a couple of errors I'm proud of how it turned out.

Please find the links below:

https://youtu.be/RvaSxF3Dzds

https://youtu.be/V3Jzkv7L_V0

I hope I've done this right. I hope you enjoy.

Thanks for looking

Happy crafting

Love Steffi xxx

Friday, 17 February 2017

House style storage caddy


Hi everyone I'm so excited to share with you this project I've just finished. I was inspired by a project in an old magazine and I've adapted it to make it my own.

Items I've used are

Thick whisper white cardstock
Pool party cardstock
A little foxy DSP
1/8" HOLE punch
Tear and tape 
Tombow 
Brands for drawers are from my stash but not Stampin Up

Here are instructions
Thick whisper white card measuring 11 1/2" × 8 1/4" score on all sides at 3 1/2" then cut as shown below


Then turn it over and place adhesive as next picture


I attached the flaps to the outside of the box (this is too keep the inside smooth so whatever we put in doesn't catch) place to one side until after the next step.

For the drawer sleeves you will need thick whisper white card measuring 8 1/4" × 3 1/2" score on long side at 1/2", 2", 4 3/8" & 5 7/8" place adhesive on thin strip and glue together.
You will need 3 of these.
Then I used tear and tape to adhere all 3 of the drawer sleeves on top of each other and then attach these to the previous box we made.

Drawers you will need thick whisper white card measuring 6 1/4" × 5 1/8" score all sides at 1 3/8" and assembly as we would any other box base. I used DSP panels measuring 2 1/2" × 1 1/4" to decorate the front. Again you will need to do 3.

I cut 2 pieces of whisper white card to 3 1/2" × 4 1/2" covered with DSP and attached to sides. Then I cut a piece of card to 3 3/4" × 4 1/2" covered with DSP and attached to the back.

Inner roof section you will need whisper white card measuring 7 1/2" × 3 1/2" score on long side at 2" & 5 1/2" cut both end sections into triangles and attach as shown in picture below.


For the roof tiles
Thick whisper white card measuring 3 3/4" × 3 1/4" and cover with desired DSP. 
Piece of DSP measuring 1 3/4" × 3 3/4" score on short side at 7/8"
Now we need to make 2 hinges for one side of the roof. White card measuring 3/4" × 1 1/2" score on short side at 3/8". Attach to each of the triangles on the inner roof section, the other half in one of the roof tiles. 
Then attach the DSP we cut to one side of the remaining roof tile lining it up just under the score line. Line it up and when you're happy with the placement attach the other half of the DSP to the other roof tile. 

Finally I put the project on a base 
Pool party card measuring 4 x 4" I cut 3 pieces at stuck them all on top of each other then I used tombow to fix our house caddy to the base.

I really hope you like what I have done. All products can be our purchased from my online shop just click on the link here on my blog. Please don't forget to use the hostess code featured on my blog if your order is under £150 to enter you into my rewards club.

Thanks for looking

Happy crafting

Love Steffi xxx


Saturday, 11 February 2017

Results of a crafty afternoon

Hi guys

I've had my crafty bits out again today. The result is the 3 cards shown below.

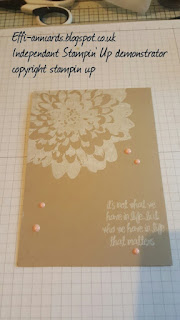
This one was made using crumb cake cardstock, blushing bride enamel shapes, whisper white KrAft ink and definitely Dahlia stamp set and Thankful life stamp set ( this one is a hostess set)

This one was made using whisper white cardstock, floral boutique DSP, lace doily,  thick bakers twine, scrap of night of navy cardstock, stitched shapes framelits, love and affection stamp set and night of navy ink pad.

This one was made using blushing bride cardstock, scraps of whisper white and rich razzleberry cardstock, blushing bride enamel shapes, blooms and bliss DSP, petal burst embossing folder, special reason stamp set, stylish stems framelits and rich razzleberry ink pad.

I hope you like what I made.
Everything can be purchased through my online shop, just click on the link on my blog. Remember to enter the hostess code if your order is under £150 to be entered into my rewards club which entitles you to some free goodies from me at the end of the month.

Happy crafting

Love Steffi xxx


Wednesday, 8 February 2017

Oops forgot to add pics on last post....sorry

Sorry guys I can't believe I forgot to add these pics to my previous post. I must of had a major blonde moment haha.

Anyway hope you like them. 


Storage solutions for SU products

Hi everyone

I decided today I wanted to make a matching set of storage solutions for some of my Stampin Up goodies.

I followed tutorials by Sam Hammond aka Pootlespapercraft on YouTube. Sam does some amazing projects that are easy to follow and a joy to make. I would imagine most of you have see  Sam's gorgeous projects already but if you haven't ( where have you been?...outer space? Lol) go and check out her YouTube channel and blog.

https://youtu.be/voPV8BnaUjU

https://youtu.be/xxJuhcDx-m8

https://youtu.be/75DM3BpwCmU

https://youtu.be/D5pw0NuitLw

Hopefully I've managed to put the links correctly to the tutorials I've followed...I can sometimes be a bit technology challenged haha

All I've done for mine is switched colours around to make them more my own.

I hope you like them as much as I do.

Thanks for looking

Love Steffi xxx


Tuesday, 7 February 2017

My card for Scrimpy's Stampin Up sketch challenge


Hi guys

It's a new week which means it's time for the new sketch challenge.
I must admit I'm loving this group and the inspiration from everyone is great!
Anyway this is my take on the sketch we were given. I used the Love Sparkles stamp set, layering squares framelit dies, melon mambo enamel shapes and DSP, melon mambo and whisper white cardstock, whisper white organza ribbon, versamark and white embossing powder.
I'm quite chuffed with how it turned out.

Hope you all like it too.

Happy crafting

Love Steffi xxx

Monday, 6 February 2017

Oh happy day card kit

Hi guys

I just wanted to share with you this fab card kit from Stampin Up. All you need is included in the kit including an ink spot, stamps, dimensionals. The only extra thing you will need is adhesive of your choice.

This is great value in my opinion as you will make 20 cards!!

Here are the pictures so you can see what you will be making, I hope you agree that these are fab.


Thanks for looking

Happy crafting

Love Steffi xxx

Sunday, 5 February 2017

Cool treats card for Scrimpys card sketch challenge


Hi guys 

I recently took part in Scrimpys card sketch challenge group on Facebook and I wanted to share with you what I done. 

I love how it turned out and I love this new suite from Stampin Up in the new spring/ summer catalogue....check out pages 32 and 33 to see everything.

If you would like to take part in the challenge each week then search Srimpys card sketch challenge on Facebook and request to join. Lots of inspiration to be found on groups like this.

Happy crafting 

Love Steffi xxx

Thursday, 2 February 2017

FEBRUARY HOSTESS CODE

Hi everyone

Jut wanted to drop by and let you know that the February hostess code is

KM6M6HFE

Please use this when placing an order under £150 to entitle you to some free goodies at the end of the month.

Thanks
Happy crafting

Love Steffi xxx